Showing posts with label Hovercraft. Show all posts

Thursday, July 19, 2012

Hover Sled Part VI


Well I have to admit that cutting and attaching the skirt went a lot smoother then I had imagined. I used both a soldering iron and a razor blade to cut/melt the holes that I needed. I then reinforced those holes with plenty of Gorilla Tape to insure that the tarp would not rip along any of my cuts. As stated before, I took my time and made sure everything went as smoothly as possible. In the end I was rewarded with a speedy process and holes cut exactly where I wanted them.


 Next I needed to secure the skirt to the center of the disc to insure a doughnut like shape. I used the top of an old Spacklingcontainer as a sort of giant washer to take some of the wear off of the skirt when inflated. Also, I was able to find a small ½ inch threaded pipe to secure it all together while allowing for pressure measurements top side. The picture below is my rough set up of this.


         Up on the top side I threaded the ½ inch pipe onto a stainless steel T, with one end plugged up and the other going into a gauge that reads PSI.


                All that was left now was to tape and staple the skirt around the edges of the disc. I first pulled the skirt taunt and then placed a small piece of Gorilla Tape on the tarp to hold it to the wood. I then stapled through this to hold things permanently. I made sure that every staple went through both tape and tarp. There had to be a layer of Gorilla Tape on top first to insure nothing would rip. The end result was like a billion staples and about a quarter of a big roll of Gorilla Tape. Yeah I know it looks trashy, but what the hell, it was holding :P


         No thought went into what would hold the power plant onto the craft so I ended up using pull ties attached to an L bracket secured to one of the mounts..


                So things were starting to come together, and rather quickly I might add. The only thing left to do now was to mount the power plant and seal up all the leaks. 


As you can see below I attached the leaf blower with some pull ties on the L Bracket, used a scrap piece of foam on one of the mounts to cut down on the vibrations caused by the running engine and then used Gorilla Tape to tape the 90 degree vent to the output of the blower. This was all sort of slapped together since I was getting anxious to try things it out.


And behold the final result. I must admit that up until this point I was pretty skeptical of things even coming together much less being able to lift my fat ass off the ground. But standing back at this angel and breathing a deep sigh of accomplishment, my hopes were renewed. Time for a test spin!


The attached video pretty much shows the life cycle of the construction, a brief test flight and some analysis at the end. Enjoy!


Analysis

  • The skirt seems to drag a bit which indicated that there was not enough air being supplied to the craft.
  • The areas where the skirt did not drag were in close proximity to where the air was being supplied to the skirt. This leads me to beleive that when not enough air is being supplied the placment of the air supply is critical to the distribution of the air coming from under the skirt.
  • The pressure gauge did not register any readings.
  
Suggestions
  • Skirt material (blue tarp) might be pourous. I checked this with the leaf blower detached from thex3 craft. The skirt material does indeed hold air and is not pourours.
  • Pressure gauge does not register because moving air creates a vacuum. I tested this by removing the test plug in the stainless steel T. Air pressure is present just not enough to register on the gauge.
  • 90 degree PVC elbow must be removed as not to restrict airflow into the skirt. This will require modification and will be part of Hover Sled 1.1
Summary
 To stay true with engineering tradition I have decided to celebrate my failures and to cautiously review my successes. I will continue to work with this craft in my spare time to resolve as many bugs as I can, and then retire this prototype when I see fit. Stay tuned for more tinkering. 

UPDATE: 
In the end the HoverSled just became trash, due to an intense need for garage space. It was fun while it lasted!
 

Friday, July 13, 2012

Hover Sled Part V


Well the heat wave in New Jersey finally broke and I was able to work in my garage again without meltingor sweating myself into a pileof useless skin. Sometimes I am simply amazed at how much bitching and complaining I do about the heat seeing as how I lived for fourteen years in Florida. It’s a different heat I suppose. Up here in Jersey the air is chock full of pollutantsand cheese steak stink. It’s not the kind of foul heat I would wish upon any unfortunate soul. Oh well, moving on.
 
When last we left off I was pondering the best placement of foam noodle standoffs on the main disc. I had decided to place twice as many standoffs as close to the edge as I could get them. Being somewhat of a “wannabe perfectionist”, I felt it necessary to draw a circle on the disc to aid in the accurate placement of the standoffs. To accomplish this I pulled my trusty circle drawing stick from the trash that I had originally used to trace out a circle on the OSB sheet in the beginning of the project. I measured out a twenty inch radius and drilled a hole in the stick. This time around I used a yellow crayon for tracing. Ooooo pretty circle.


Next I roughly placed the standoffs along the yellow line. I had pondered making a small PVC tool that equally spaced all standoffs from one another but I figured that it was more trouble than it was worth and decided to just space the standoffs apart by eye. Now you know why I refer to myself as a “wannabe perfectionist”. 


I then mixed up a generous portion of epoxy glue and started in on the gluing. Because this was quick setting stuff, five minutes I believe, I only squirted out enough to provide epoxyfor two or three standoffs at a time. I would smear and glue, smear and glue, then mix more up. I did this about eight times until everything was glued on. The problem now was that I needed a way to apply pressure to all the standoffs to insure that they would not move at all and take hold. Luckily I still had the other half of the OSB sheet on hand. I placed this on top gently with the aid of my scoffing wife and then topped it off with a paving stone for added weight.


Twenty four hours later and everything appeared to be glued nicely. I was not able to remove any of the standoffs no matter how hard I twisted and turned them. I must admit that the picture below made me think that I was assembling a gigantic escarpment wheel. Hmm, a neat idea for a future project?


Up until now the construction has been pretty straight forward. I am not really tackling anything that I have never done before in the realm of simple building techniques. However, I am now at a point where I need to start working on the skirt and this is something that is pretty alien to me. I have never really worked with plastic before, much less shaping or cutting it. Sure, I was an injection molder like fifteen years ago but that was basically popping plastic parts out of a machine and trimming the excess plastic off of them. When you wonder how those headphones you are wearing were made, think of me sitting next to a gigantic machine half stoned out of my head on noxious plastic fumes and Xylene. America is sending our jobs overseas? They can have those jobs, I’ll stick with the IT industry myself. 
 
Anyway, to get back to the point, I have never played with cutting and shaping a plastic tarp, so this was a first for me. My apprehension stemmed mainly from me getting confounded easily over how to make a two dimensional cut on something that will be inflated into three dimensions. Rather than thinking about it too much, I just decided to divein. So far I’ve had decent luck with that.
 
The main issue I had to tackle was how to get a hole in the plastic that would be strong enough that it would not rip the plastic when tugged around by the forces of movement and inflation. I tried two things. I cut the plastic with a razor and I also melted a hole with a soldering iron. The melting seemed to produce a better more durable hole in the plastic so I settled with that. I further reinforced the hole with a piece of Gorilla Tape on each side of the hole. Below is a picture of my test piece. I pulled and tugged and attempted to rip the hole and was not able to. So I think I have my method.


 Finally, I laid out my 6x8 tarp and placed the disc on top of it. I then marked where my cuts and holes would go. I hope the cutting goes smoothly. I believe it will be a slow and grueling process. Once complete I can then mount everything on to the disc and take it for a little test flight. 


I hope this is my last entry before accomplishing all of that.


Sunday, July 1, 2012

Hover Sled Part IV


                Ok so with the recent amount of heat we have been having in New Jersey and the windfall of my ThreeDollar Thrift Store Score, I haven’t been focused enough to work on the Hover Sled. That is until a few folks prodded me. This morning however, it was just cool enough for me to tinker in the garage without a billion fly’s bumping into me for whatever reason. Because I can only mix and set epoxy once, I decided to hold off a bit on gluing things to the disc and rather measured some things out and do a bit of pondering.

 
Here we see the disc all cleaned off with a rough placing of parts.


 I stapled some weatherstripping to the edge of the disc to protect whatever skirt I use from ripping along the jagged edge.


I drilled a hole though an old lid used on a drywall Spackle bucket. I then put a bolt in it and screwed it into the center hole of the disc. This is just for measuring purposes. I plan to use a cleaner lid fastened to the disc with a small pipe that will allow me to take pressure reading. Some may be puzzled as to what the lid is used for. This will act like a big washer that will hold the center of the skirt against the disc and allow an air filled skirt to maintain a doughnut shape. The skirt will have strategically placed holes in it to allow air out and form a cushion of air. For now I am using this dirty lid to measure how far away from the center I will place the foam noodlestandoffs.


There are two configurations that I am pondering. One, in which the standoffs are half way across the radius of the disc and another where they are placed near the edge. I’m certainly no physicist and can only imagine the dynamics of the airflow involved here. So with three shots of espresso in my morning coffee with a soy milk topper here goes my thought process.


Varying the distances of the standoffs from the center of the disc changes the ratio of air relative from the inside of the skirt to what is under it. Furthermore the farther out from the center the standoffs are the more stability that can be achieve whenever a fat ass is plopped on top of the disc. With the standoffs closer to the center I would imagine that there is a larger area of air cushion that is more uniform. With the standoffs more distant from the center the air cushion is larger in volume but not as uniform over the entire area of the disc.
 
I had thought that maybe from writing this out I might come to an epiphany but that just never seemed to manifest itself, so I think I’ll just roll the dice and settle with the standoffs being father away from the center. Off the top of my head this would seem to be more stable. I guess I will just have to glue them on and see.


Tuesday, June 26, 2012

Hover Sled Part III

  YAWN! 6 AM is entirely too early to be sitting in the office at my desk. Yet, here I am torn from the comfy confines of my suburban bed, greasing the wheels of our economy by crunching and pumping out code that makes some things talk to other things in a way that they  both agree on quantities shipped and dollars spent. Such is the life of a codemonkey at a distribution company.

                This past weekend was a long one for me. I took last Thursday and Friday off for a little vacation to celebrate my wife’s birthday. As a result, not a lot was done to the hover sled. I did, however finally fulfill my lifelong dream of knowing what it was like to be flushed down a toilet. There really is no other way to describe the experience I had on this particular water slide at Hershey Park. I use this analogy because of the way you are literally flushed out the bottom of the slide, and more importantly because the people that I encountered at the end of it really did act like turds. They just sort of floated about in the pool with various bits of food stuck to them. Regardless I had a good time and was pretty exhausted when I arrived home. That of course did not stop the wheels of progress. I did manage to get SOME things done to the sled.


One of the things that held my concern was how far the vent pipe would protrude from the bottom of the disc.

If I wanted the vent pipe to be secure against the disc I would need it to protrude at least a little from the bottom. To minimize this distance I used a PVC coupling that I cut down with the miter saw. You can view this below along with mounts for the power plant and the seating.

Once the vent pipe was installed I used a sort of woodworkers putty/glue to secure it into the hole.

 
With everything all secured and glued into place. I placed the disc up on wood blocks to keep the PVC coupling from touching the ground as it stuck out the bottom of the disc.


The vent pipe sticking out still had me concerned. Sure I could place the skirt over it and for the most part the whole thing would probably work, but I did not like the fact that something would be sticking out of the bottom and could possibly tear the skirt if I hit something. I needed something that would lift the disc off of the ground and still allow some flexibility for the skirt to be freely inflated. Something soft yet ridged. Something I can easily affix to the bottom of the disc. My solution?


These things are cheap and have all the properties to fit my needs. I think I spent $1.99 on one at Target. What else can you buy for $1.99? I just need to run some tests on how I can secure pieces of this to the bottom of the disc. I figure I can slice it down like a meatloafinto 2 inch thick pieces and then line the outer perimeter of the disc with them. I took a small slice and used epoxyto affix it to a scrap piece of OSB. I then placed a weight on top of it and let it sit overnight. The result was perfect. No matter how hard I tried I could not pull the noodle off of the OSB. I just need to slice the noodle down and get to gluing.


So far I have been pretty impressed with my budget on this project. I have only spent, nine dollars on the OSB, sixty-eight cents on the PVC coupling and a dollar ninety-nine on the pool  noodle. I might have to shell out for some more epoxyand that will be around ten dollars but over all for night after night’s worth of entertainment you cannot beat the price.

More to come…


Friday, June 15, 2012

Hoever Sled Part II


So when we last left off I had a nice circle drawn on to a piece of OSB with purple crayon, which if I knew was the same name as some hippie learning center I would have most assuredly choose a red crayon instead. Since then I have been cutting, measuring and of course dreaming.  Not too much of a story to tell here to make this entry interesting, but for those interested I DID eventually find my pipe cutter, while fumbling about in the garage working on the sled. Below you can see my semi-nicely cut disc which will be used to propel me ever skyward. I took the liberty of sanding the edges to make them somewhat smooth as not to tear any experimental skirt that I will be wrapping around it.


Since I already had the saber saw out and warmed up, I went ahead and notched out the vent hole, where the air will enter the skirt. According to Beaty’s Ultra-Simple Hovercraftdesign, the vent hole is placed halfway between the center and the edge of the disc. I obliged him on this. While I was cutting this hole I started to think about the center hole. Beaty uses a bolt to hold the center of the skirtup close to the disc to create a doughnut shape. I wondered if, instead of using a bolt and nut, I instead used a small pipe and then screw a pressure gauge onto the pipe. This way I could get a pressure reading of the air under the skirt. Hmmm I will have to ponder this some more.


At this point I got sick of using the saber saw and decided to pull the miter saw out. My, or should I say my father’s, miter saw scares me. Long ago my father bought me a miter saw from Harbor Freight as a gift. I used it for years and years and years. Then one day the safety guard broke off of it and having an astute fear of having my hand get butchered and bloodied it sat in my garage for another year. 
 
This fear is not exactly well based but it has provided me with ample aversion to having any such wound inflicted upon my person. Aside from the terrible noise that a spinning blade breaking the sound barrier makes, there was a story that my father once told me that firmly cemented my fear of power tools. 
 
As all good fathers’ do, they regale tales of yesteryear with a dash of insight and knowledge to include a valuable life lesson in their words of wisdom. The story goes, when my father was a teenager, sometime in the mid-fifties, his father was in the basement showing him the dos and don’ts of running a table saw. Table saws of the period were little more than, gigantic electric motors directly coupled to a spinning blade much like the kind one would imagine in a saw mill located in Walnut Grove. They were big, they were cumbersome, and they were ANYTHING but safe. So the with the flick of the switch, the smell of ozone in the air, and a roaring howl of the spinning blade, my grandfather proceeded to tell my father the safety points of using the saw. 
 
1.       Hold onto you work, the blade WILL try to snatch it out of your hands.
2.       Wear safety glasses, shit WILL be thrown into the air.
3.       NEVER under ANY circumstances do you put your fingers near the blade like THIS!


The smile quickly, left my grandfather’s face, and he began to turn white. This was probably from him losing most of his blood out of his now bleeding finger. That’s right, probably one of the only safety lectures on the books that resulted in producing an injury rather than preventing one. There was blood everywhere. He eventually went to the hospital and got patched up. My father, as a result, ALWAYS respected power tools from that moment on, I guess such a graphic safety lecture stuck with him. I, on the other hand, was trying to make sense of this story through my father’s tears of laughter the entire time he was telling this to me. I won’t lie, it scared me a little, and in the end I respect power tools immensely. This all came back to me one day when I was in my garage, and I decided to just give the miter saw away to someone. This person ended up being the trash man.
 
Now, as I have explained before, my house is in a constant state of disrepair and the need arose once again for the use of a miter saw. This cropped up one day in a discussion while I was visiting my father. He quickly, assured me that I did not need to go buy a miter saw he had one that I could borrow. I asked him when he had purchased this one and he told me that he bought two when he purchased the one he gave me. I did not argue or question anything at that point I just merely accepted. HOWEVER, there was a strange element about all of this. When he brought out the saw to me it appeared to have its safety guard removed as well. Apparently my father had the same issues I had with mine. So despite all of my fears, in the end I have to use a miter saw with no safety guard. I suppose that is my lot in life.
 
Moving on, I used the miter saw to cut out the standoffs for the leaf blower power plant. I had toyed with the idea of boxing it up, but I wanted to make sure that all the air that it required would be delivered to it, so two standoffs would do the trick and keep the weight down. I think I will add a small third one under the junction between the blower and the 90 degree elbow.

 
Finally, I messed about with some small pieces of wood to get some ideas on a seat.

Things are moving along at a decent pace. Onward and most definitely UPWARD!

Wednesday, June 6, 2012

Hover Sled Part I

     Ok so some time ago, I saw someone, somewhere floating about on a homemade hovercraft, slapped together with little more than a shower curtain, a piece of plywood and an old vacuum cleaner. This of course set me to thinking about how I could join the ranks of such bold aeronauts of the DIY persuasion. So, I naturally started reading up on the subject and scoured webpage after webpage. Finally I found one that spoke to me in both ease of construction, and in simple enough terms that would allow my mind to easily digest the concepts while allowing for my own improvising of design. The author, WilliamJ. Beaty appears to be a research engineer and as far as I can tell his design for the ULTRA-SIMPLEHOVERCREFT was created for a child’s science fair project. I won’t go into detail or rip off any of the pictures from his website out of respect and more importantly because I am lazy when it comes to displaying all my research. 
 
This project is really just a pass time for me. My home is in great need of repairs and I always seem to be working on it. Between that, and my career, I need a little break from time to time. I figure a small project that exercises both manual dexterity and engineering skill will keep me somewhat sane. The only restrictions I will put on myself are that the cost needs to be kept at a minimum, there is no time limit on completion, and I have to have fun doing it. This means cutting corners to improvise, and a high likelihood that there will be plenty of silliness involved.  Now with that said I believe it’s time to get started.
 
The bathroom off of my master bedroom is my current embarrassment. When it was in full functioning order, I was ashamed to “do my business” in it, and now that it is all ripped apart and stripped down to its bare bones, I feel like I am going to the bathroom in a half built, shell of a home. It really is rather depressing. Because of other home projects going on, my bathroom was stuck in a state of limbo. I demolished it to get rid of some potential mold problems, and placed a functioning sink and toilet in it. Then before I knew what was going on, my wife had me working on a back room to get it all painted and have the outlets swapped out to something from this century. As a result of this, my bathroom sat, caught between a world of utter ruin, and a functioning lavatory of mere floor boards and wall studs. This past weekend was my first chance to start working on it again. I replaced a piece of drywall in the ceiling and was prepping things to remove some of the shower plumbing. I needed a pipe cutter to start removing the plumbing from the shower, and the one that I have was hopelessly buried in my garage somewhere. To save time a trip to Lowes was in order.

While at Lowes I spotted some 7/16th roofing OSB that was on sale for nine dollars. I just couldn’t resist and ended up buying a piece. For deep within the recesses of my mind the dreams of sliding about on a personal hovercraft started to bubble forth into my consciousness. A small voice whispered to me, “It is time”, and before I knew what was going on, I was strapping a 4x8 piece of OSB to the top of my vehicle. I never did end up buying a pipe cutter.

 
Ok, so this is what I have so far. I am roughly following the plans for the ULTRA-SIMPLE HOVERCREFT. For manageability I cut the 4x8 piece of OSB in half so I would not be tripping over it in my garage. Here you see the piece up on saw horses. If you look closely you will see my failed attempt at drawing a circular pattern on the board so I could cut it down into a disk shape. On further inspection of this photo, particularly in the background you will notice that it is also trash night, and I still have left over flags from Memorial Day on the floor of my garage.


       Because, and I must stress again that, I am lazy. I was all ready to engage my saber saw into cutting out this crudely drawn pattern on the OSB, when I started to feel a little pang of shame growing inside of me. Sure this is a crappy ghetto version of a hovercraft but I should at least have an ounce of self respect in making it appear as if some symmetry was involved with its construction. It then became clear to me that I needed a better way to draw a circle on to the OSB.

          I started by carefully measuring where the center of the OSB was and then drilled a ½ inch hole there.

Next I drilled two ½ inch holes in a scrap piece of wood. The distance apart being the radius of the circle, this was around 2 feet. I then secured one side of the scrap wood to the center hole of the OSB and dropped a purple crayon into the other hole.

      I have to say that I was pleased with the results. I was left with a big fat purple line that my saber saw could easily follow.

By the time I had figured all this out it was starting to get late so I decided to save the cutting for another day. However, I was a little curious as to how or if the power plant would even fit onto the disk. 

     There are a few considerations that I need to take into account when mounting this. First is that it is electric so I will need a way to secure the extension cord as not to have it pop out in mid operation, secondly I will need to elevate it because the air intake is on the bottom. And finally I will need a way for it to fit compactly onto the disk while allowing the air to be channeled downward towards the skirt all while I am sitting on it.


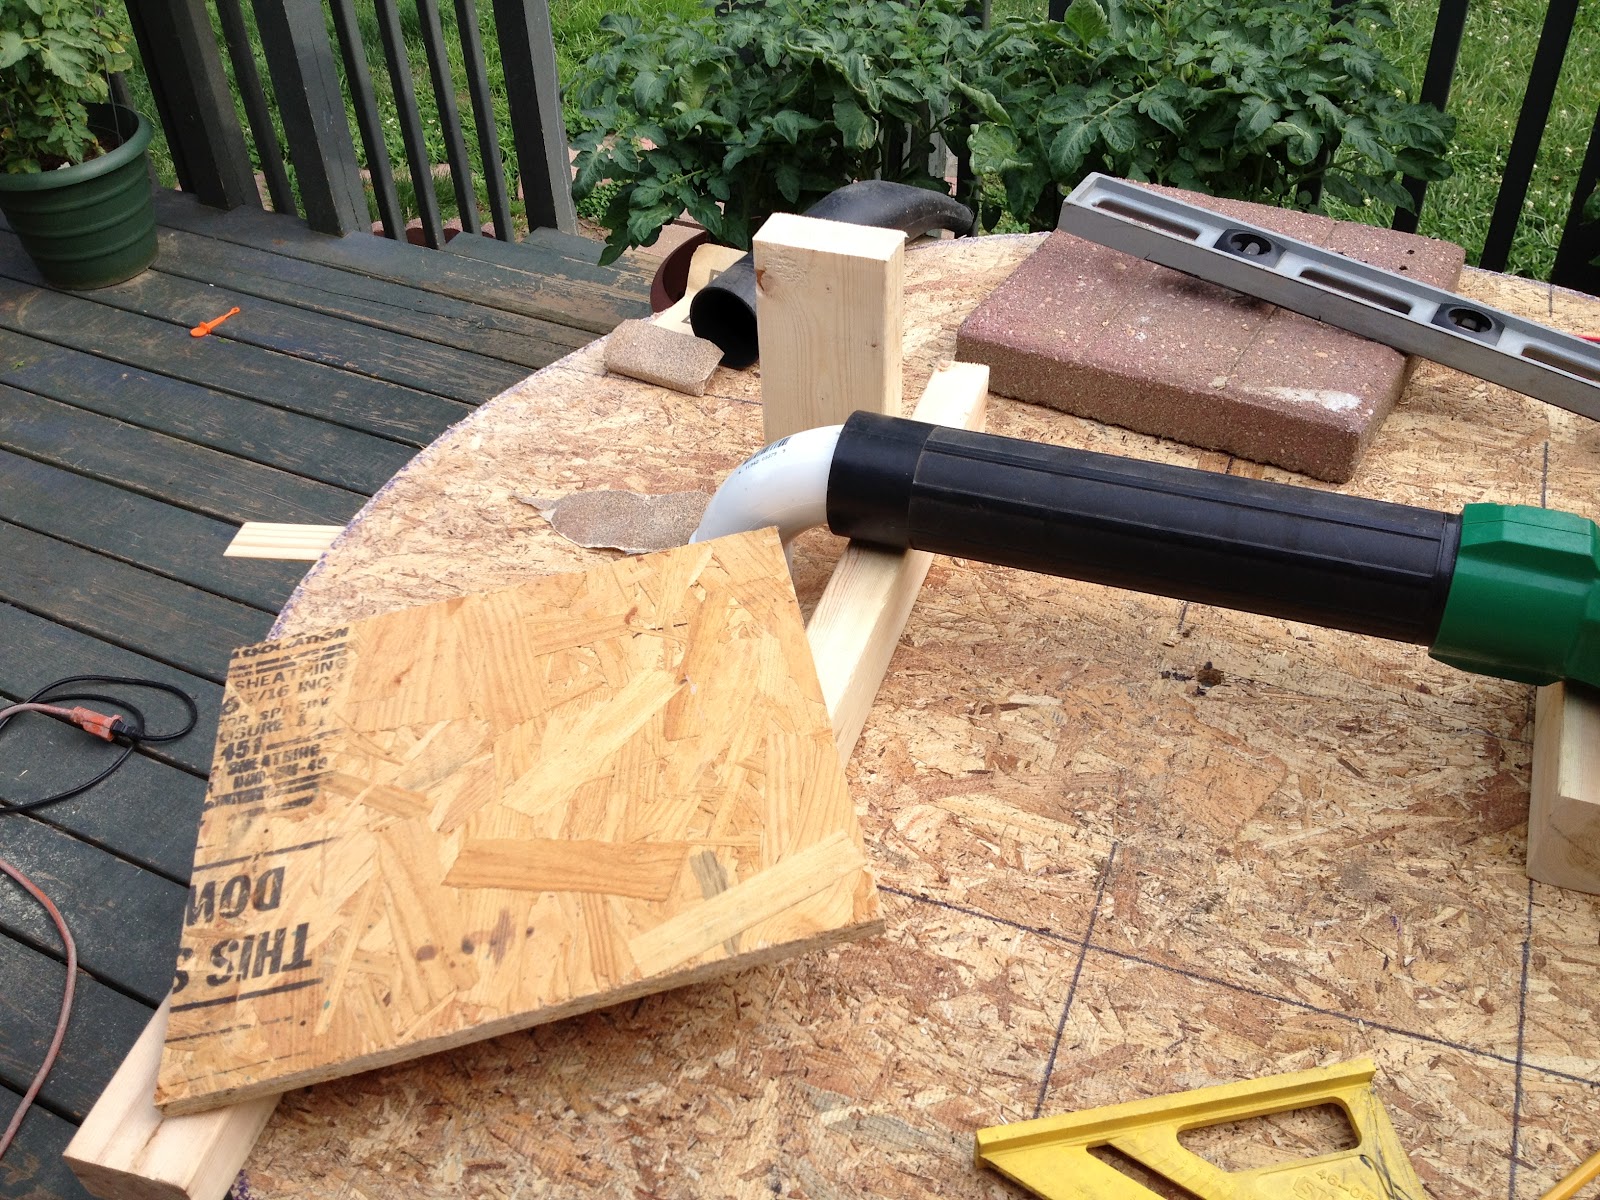
This is roughly what I envisioned. I can secure the leaf blower up on a few pieces of 2x4 using clamps so it will not move. Then I can have the air channeled downward using an old 2 inch 90 degree PVC elbow, that I will modify to fit the task. I can then construct a small seat above the PVCelbow to plant my fat ass upon.

                Keep in mind that this is just the plan and is subject to many variations along the way. After all it’s supposed to be fun that I am having, so I am just going to cast a lot of stuff into the wind and just kind of experiment and let the project take me where it will.